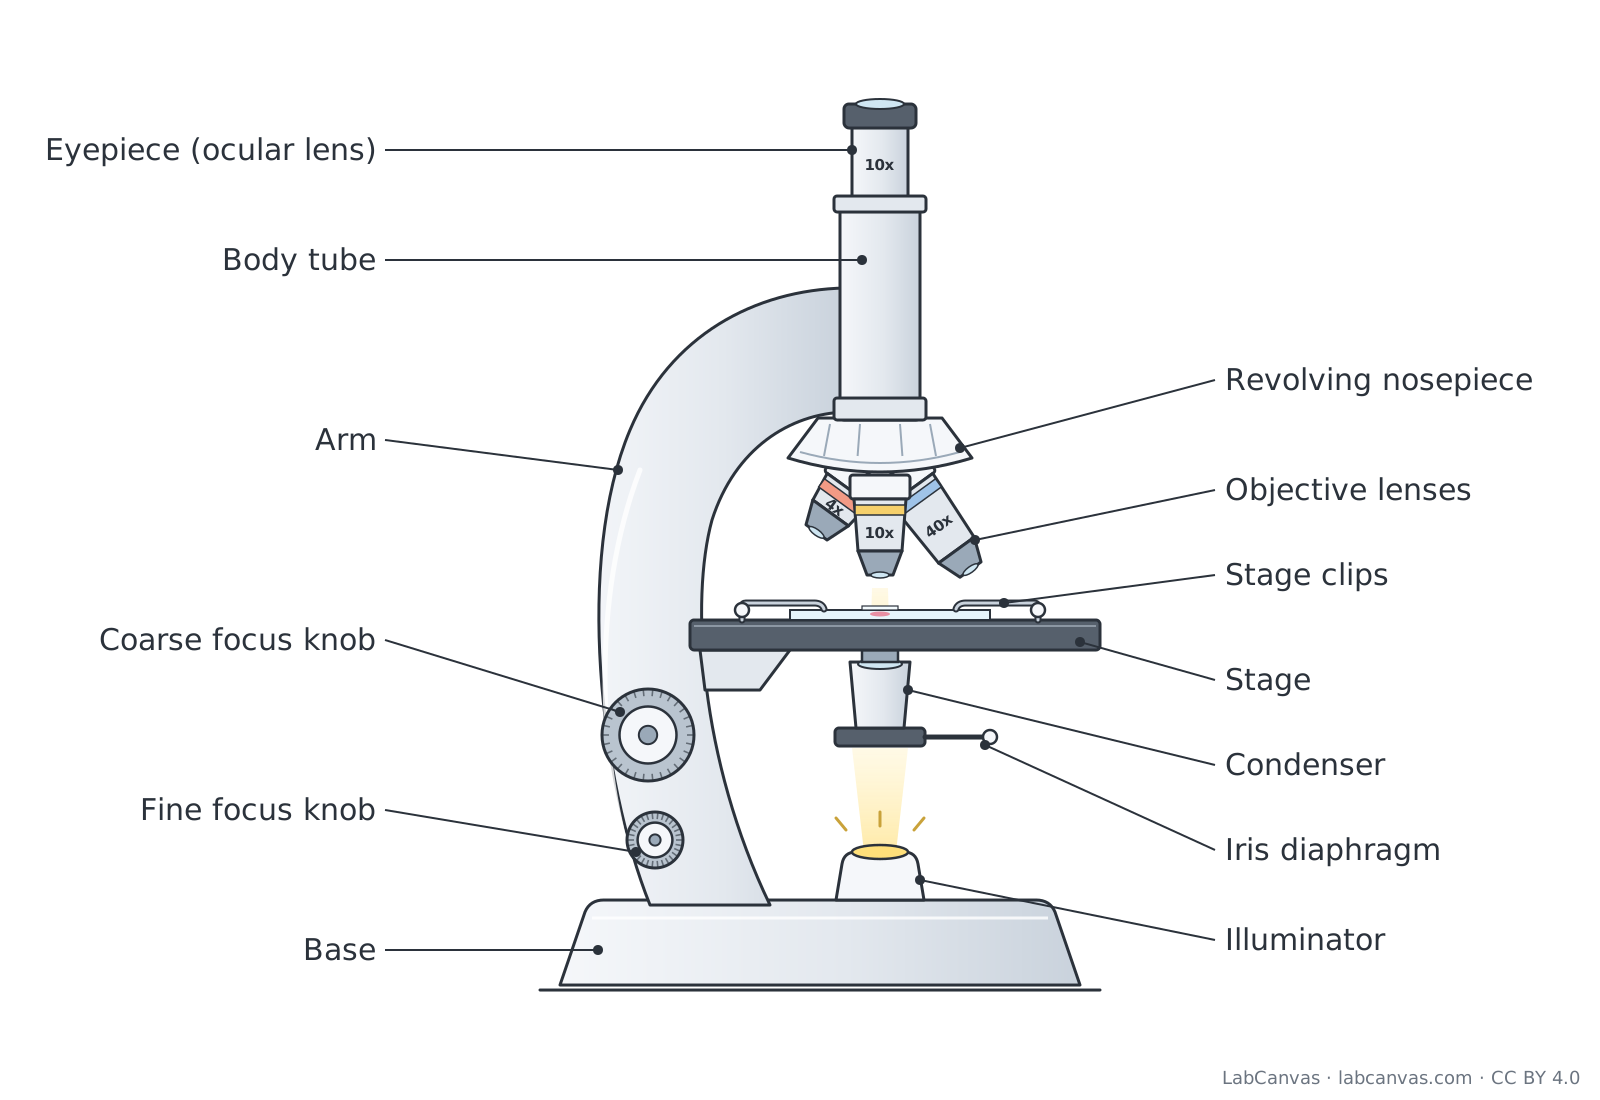
Parts of a microscope diagram (labeled)
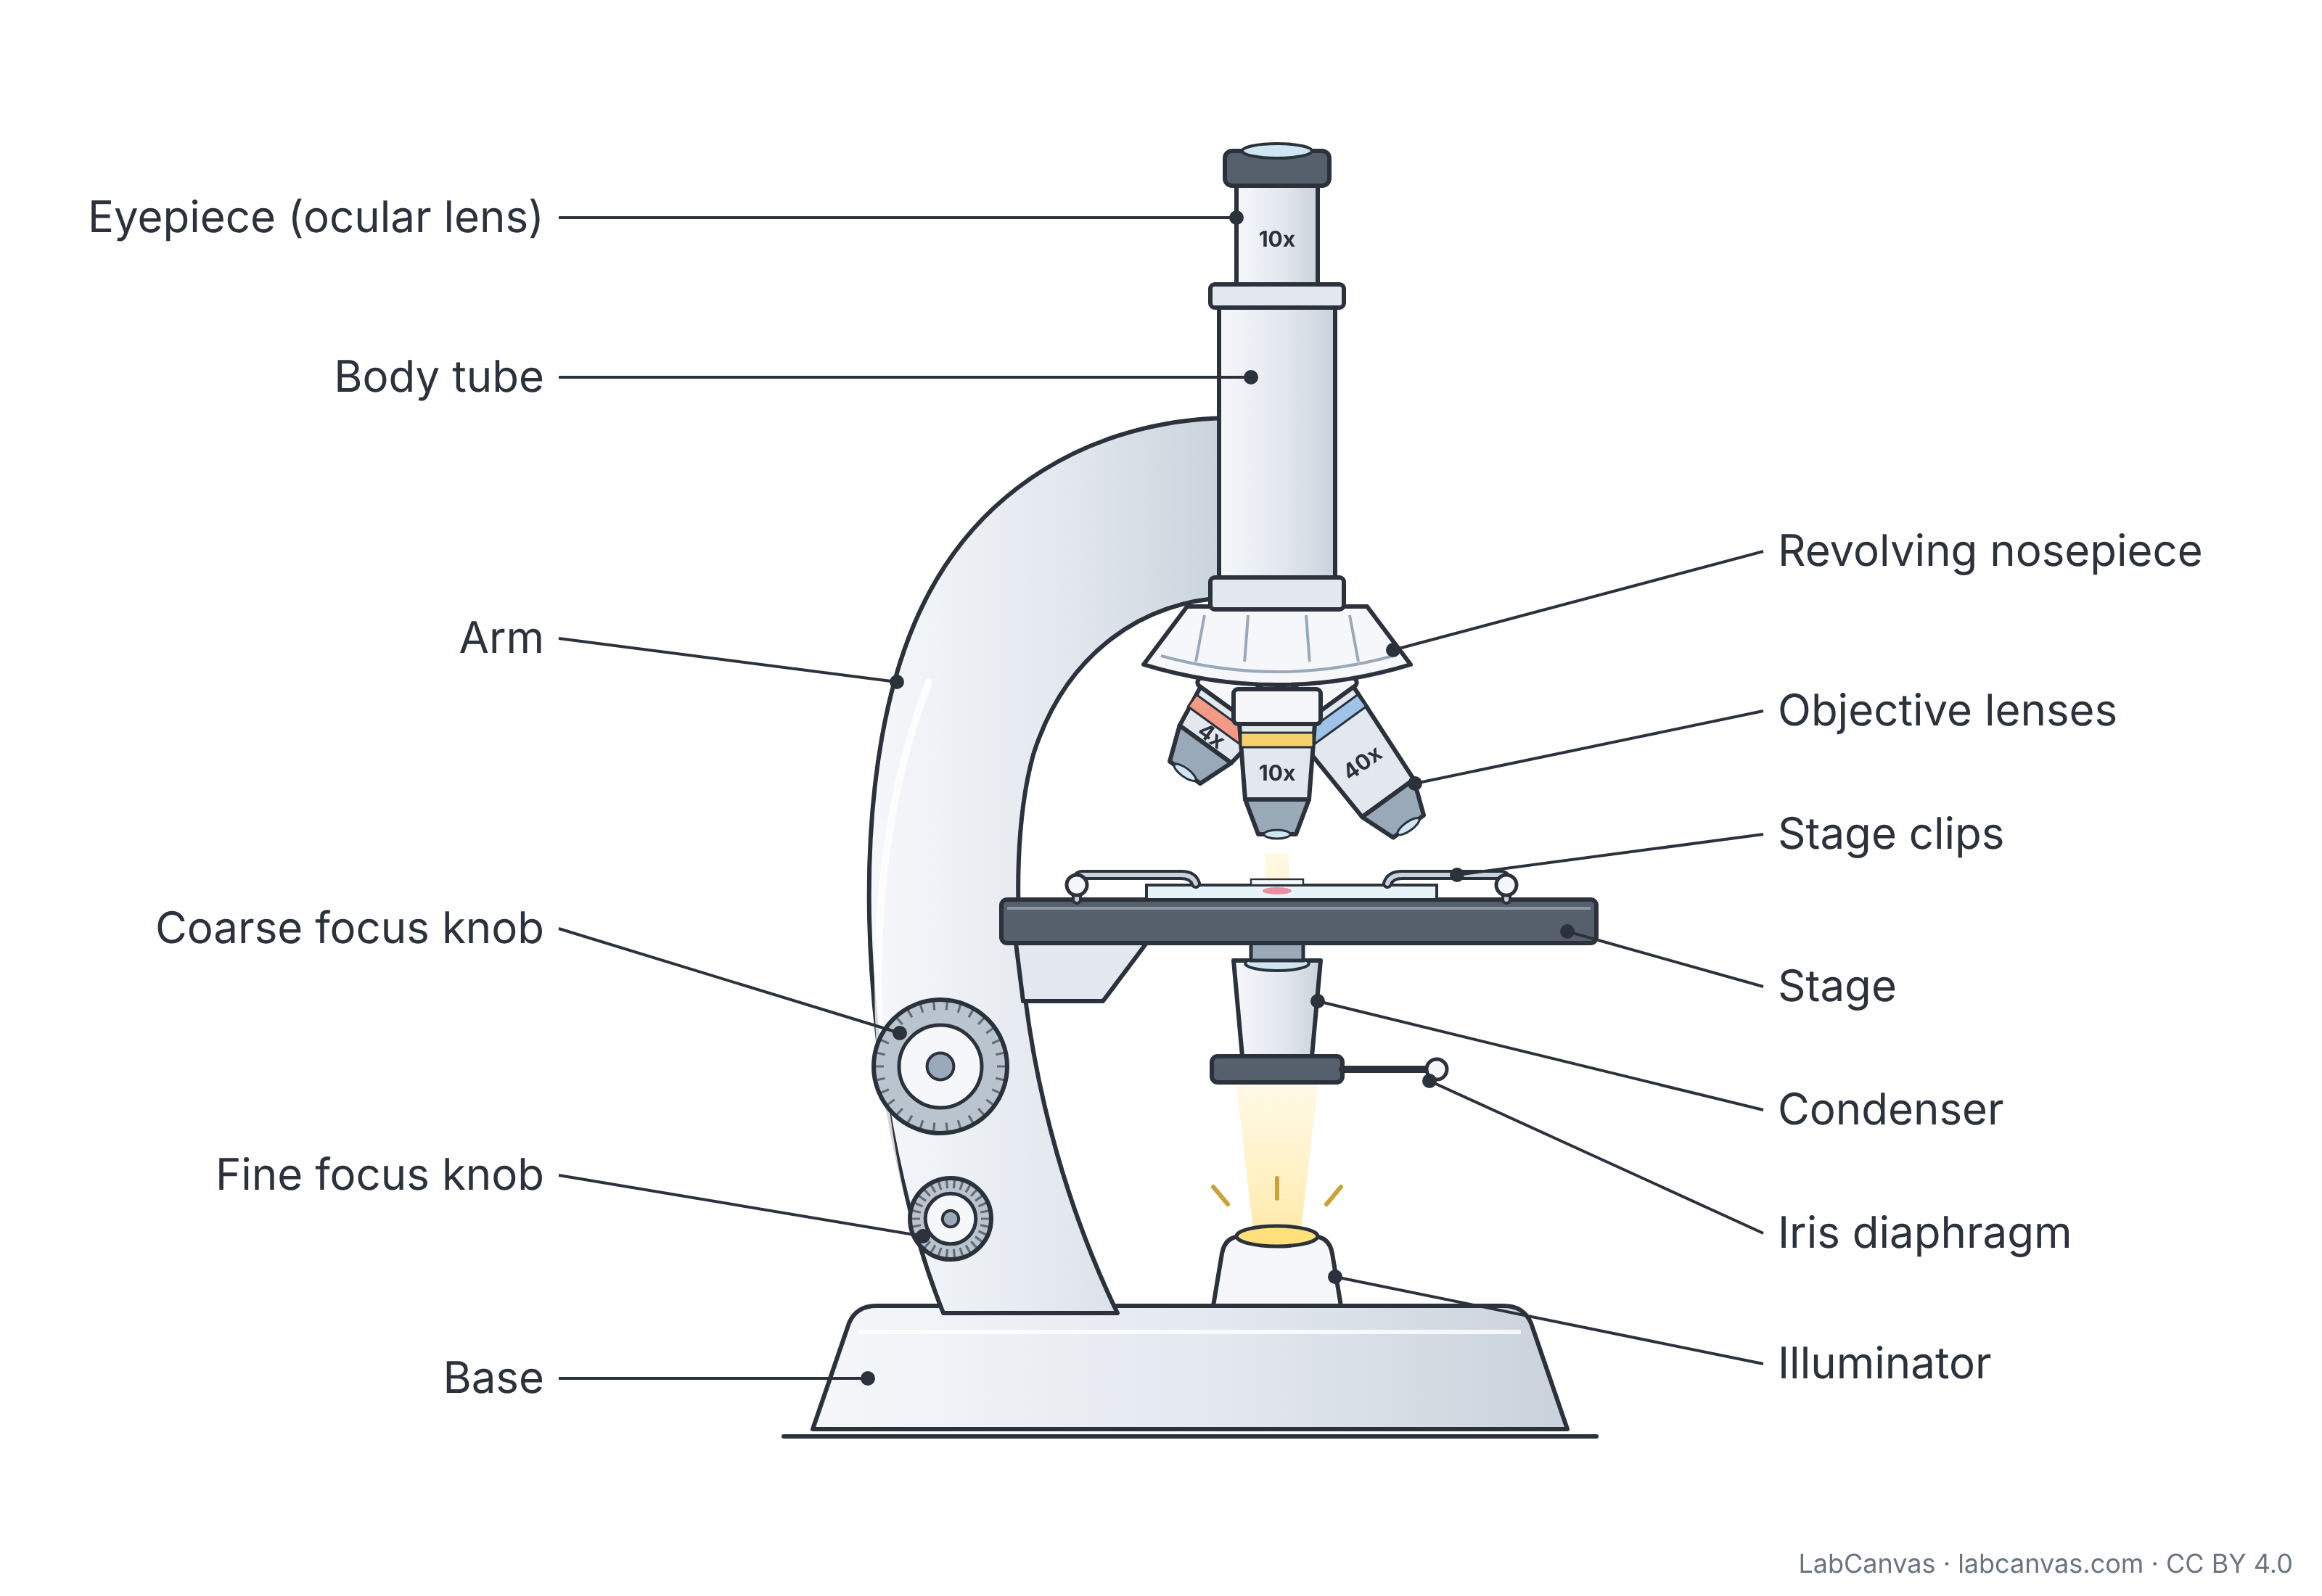
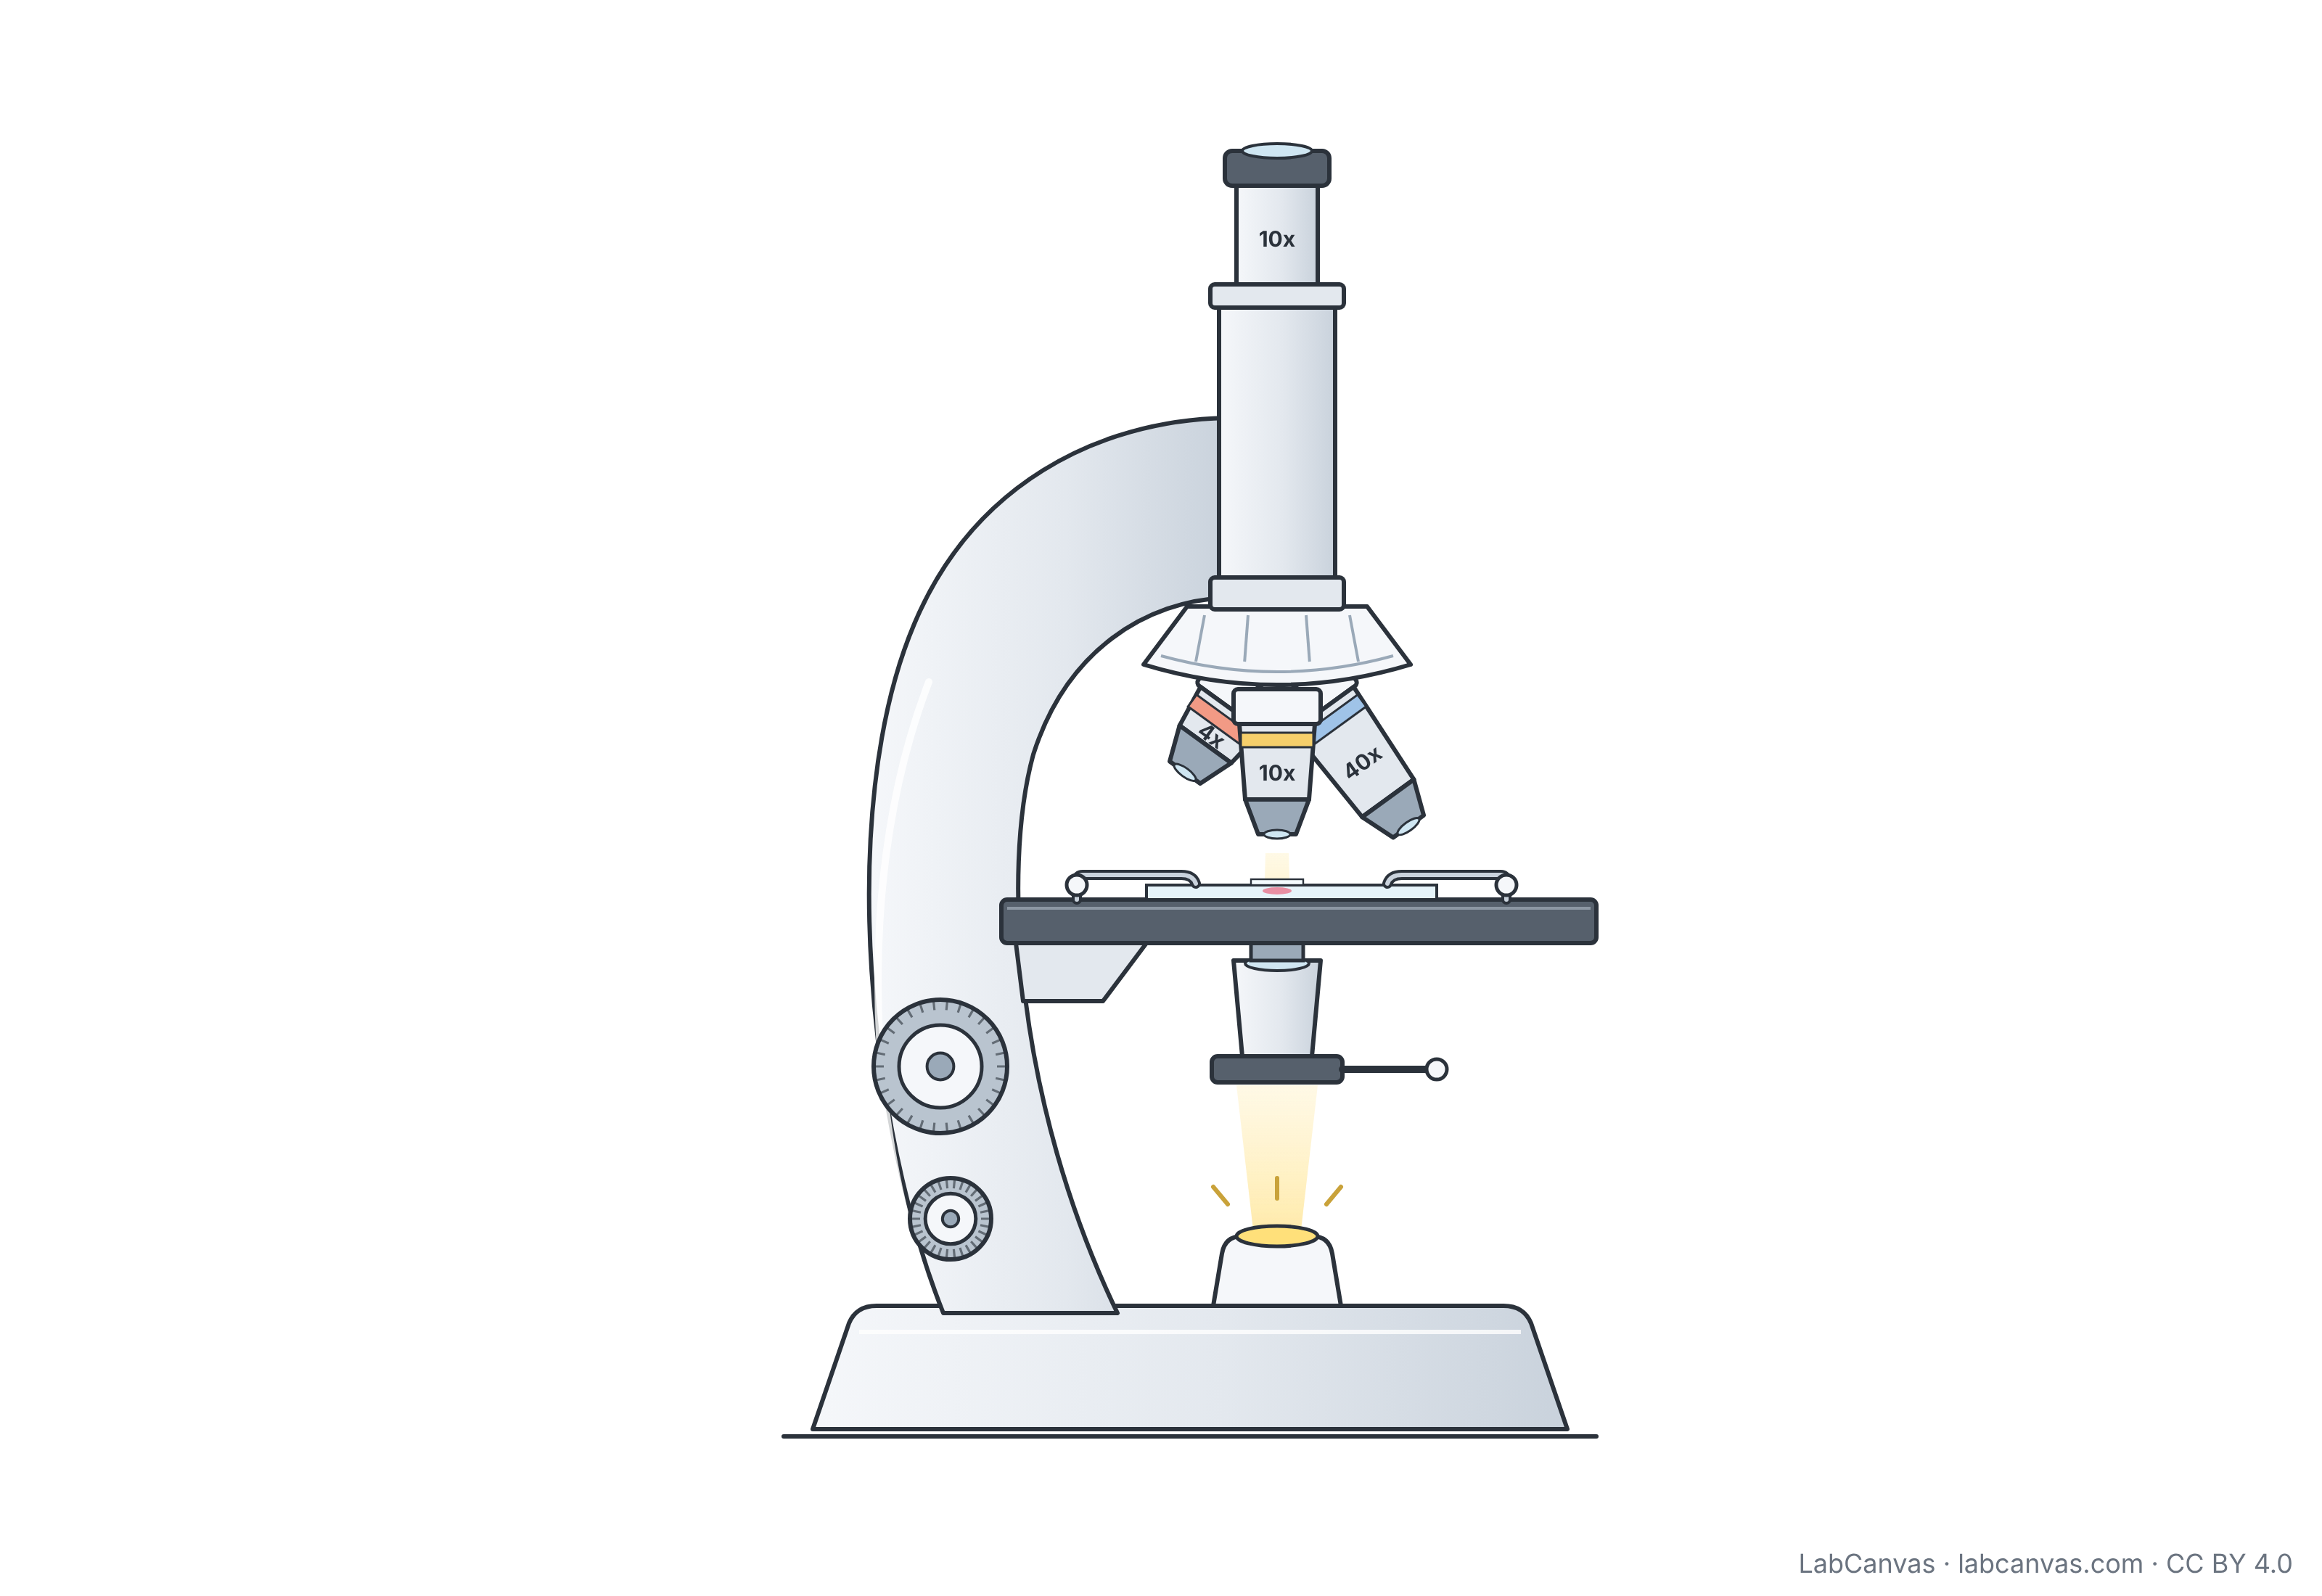
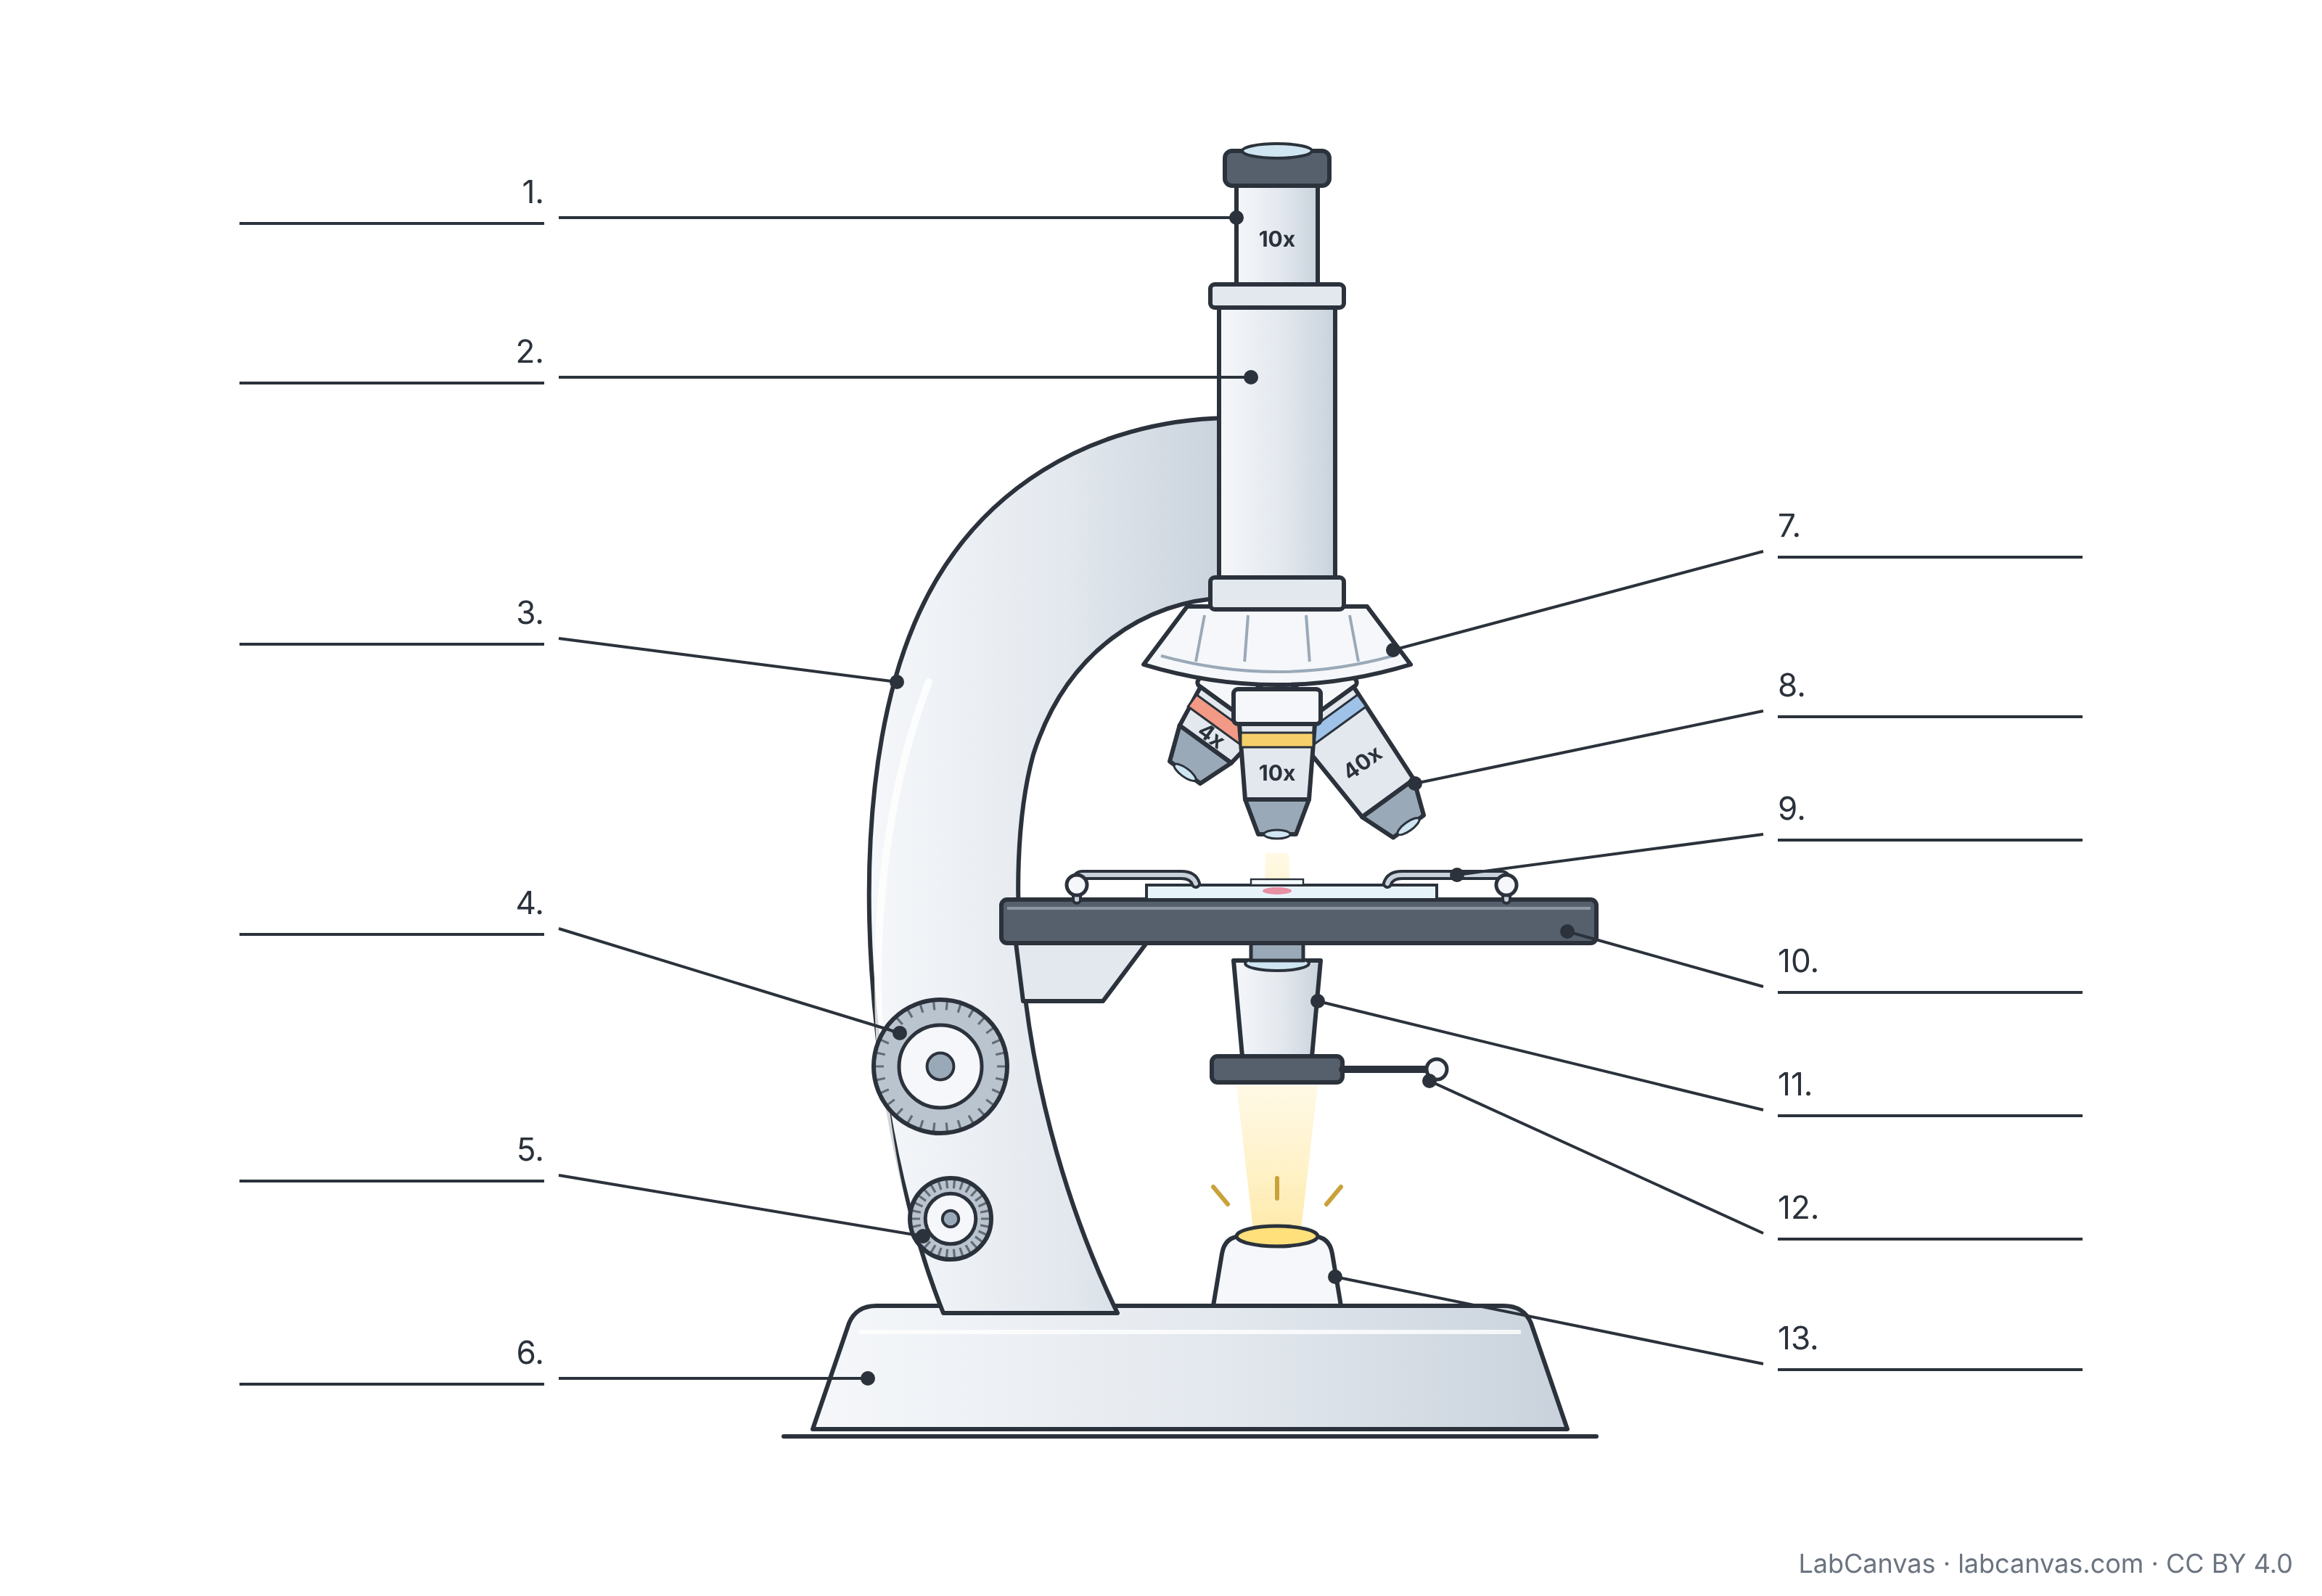
A compound light microscope magnifies a specimen in two stages: an objective lens near the slide makes an enlarged image, and the eyepiece (ocular lens) magnifies that image again, so total magnification is the eyepiece power times the objective power. Light from the illuminator passes up through the condenser and iris diaphragm, through the specimen on the stage, and into the objective. This free diagram labels 13 parts and comes unlabelled and as a numbered worksheet with an answer key.
Last updated
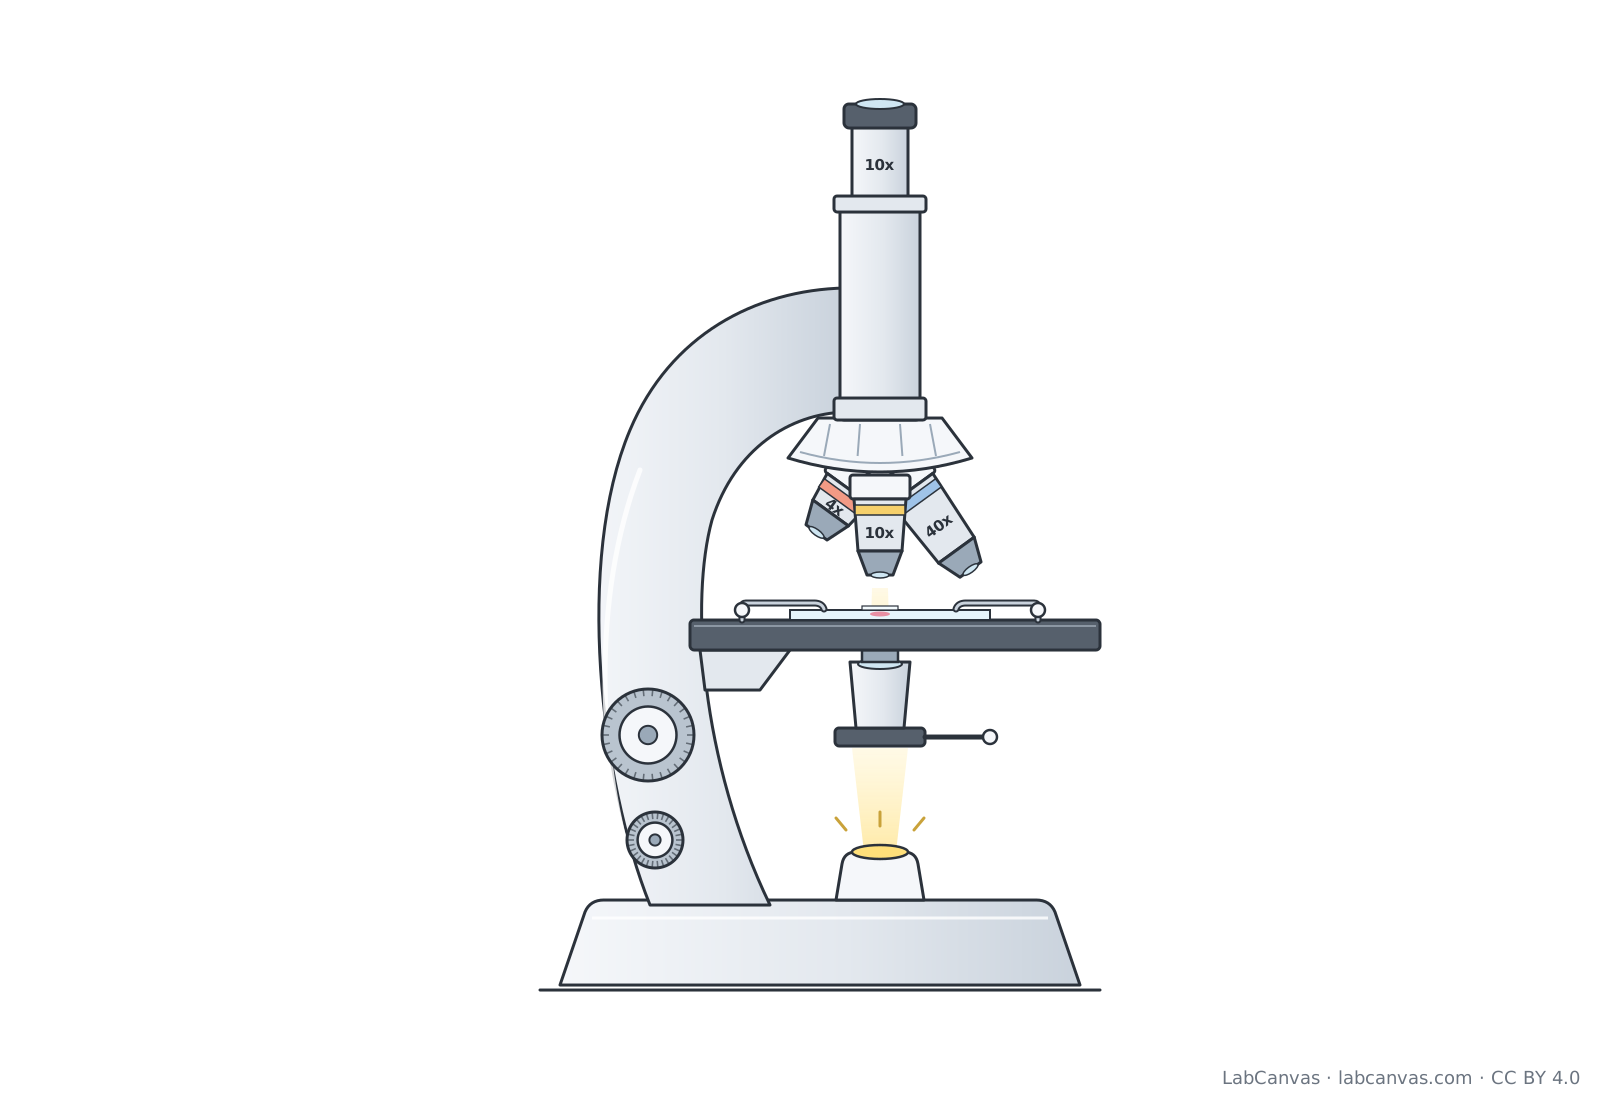
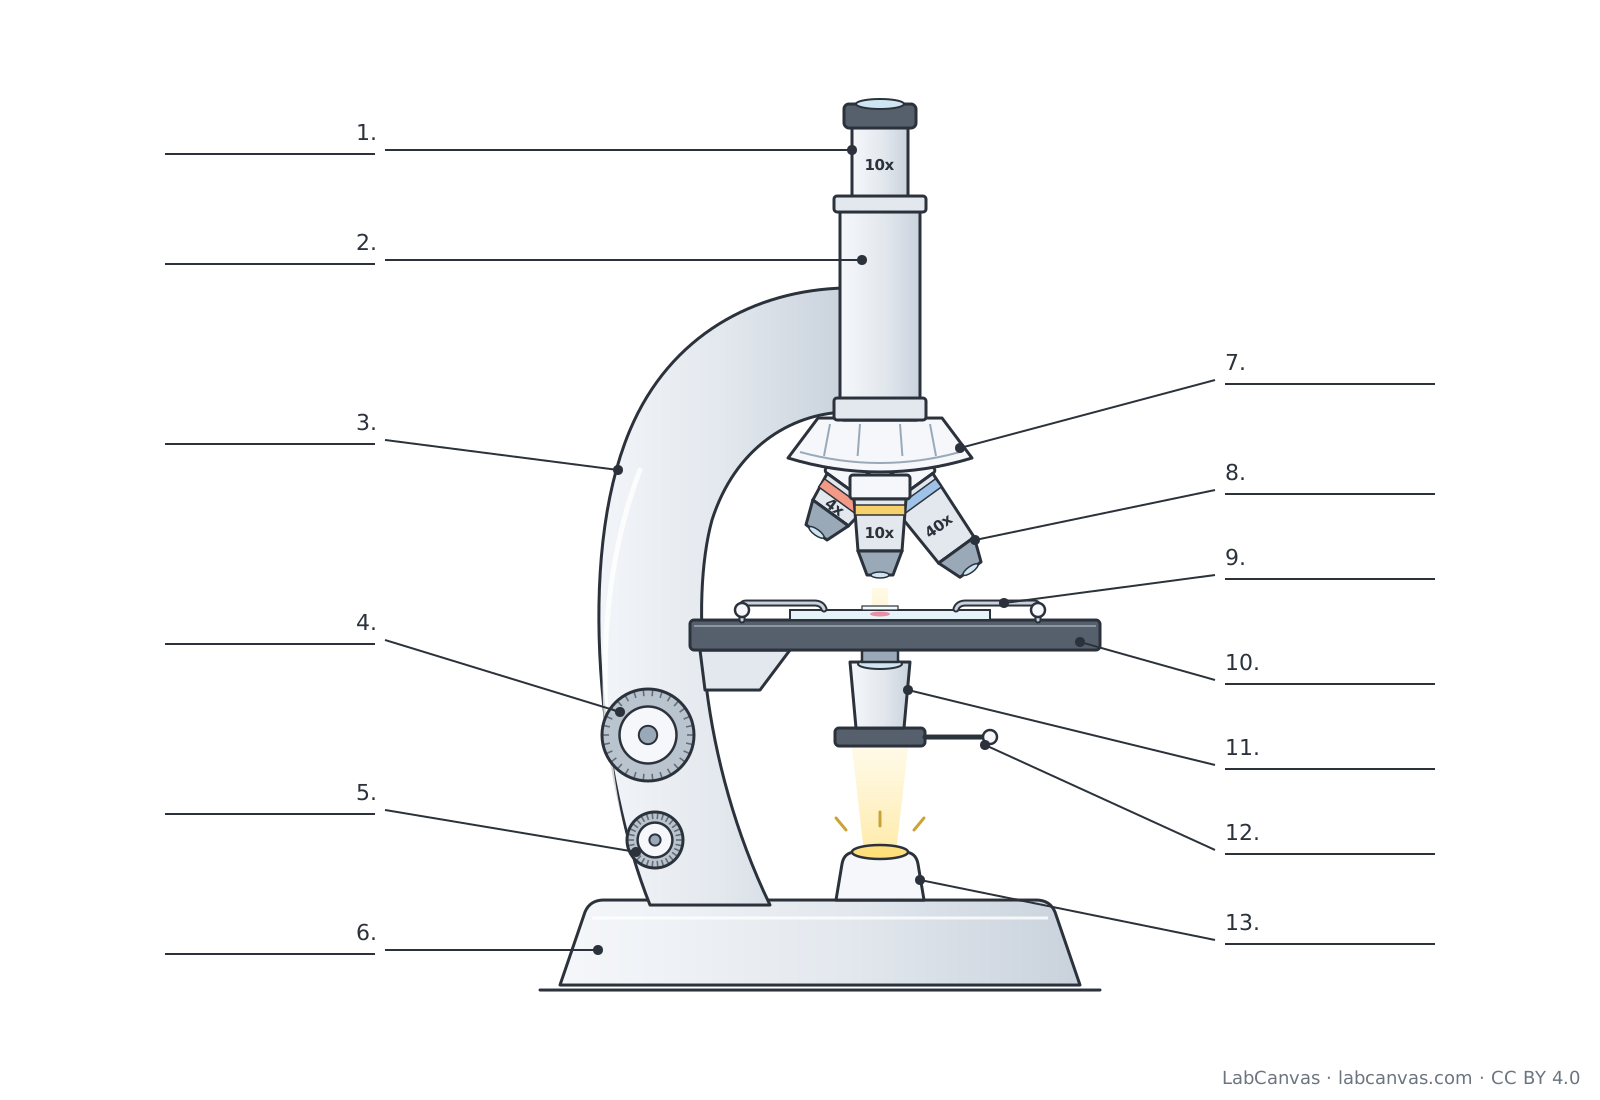
Download the microscope diagram
Free to use in homework, teaching, slides, posters and publications under CC BY 4.0. Please credit: Microscope diagram by LabCanvas (labcanvas.com), CC BY 4.0
Parts of the microscope and what they do
| # | Part | What it is or does |
|---|---|---|
| 1 | Eyepiece (ocular lens) | The lens you look through at the top; it magnifies the image made by the objective, usually by 10x. |
| 2 | Body tube | Hollow tube that holds the eyepiece at the right distance above the objectives and carries the image up to it. |
| 3 | Arm | Curved support that joins the head of the microscope to the base; hold it here when you carry the microscope. |
| 4 | Coarse focus knob | Large knob that moves the stage (or tube) a long way to bring the specimen roughly into focus; use it with the low-power objective. |
| 5 | Fine focus knob | Smaller knob that moves the stage only slightly to make the image sharp; the one to use at high power. |
| 6 | Base | Heavy, flat bottom that keeps the microscope steady and usually houses the light source. |
| 7 | Revolving nosepiece | Rotating mount that holds the objective lenses and turns to click a different objective into place over the specimen. |
| 8 | Objective lenses | Lenses closest to the specimen that make the first magnified image; a typical set is 4x, 10x, 40x and a 100x oil immersion lens. |
| 9 | Stage clips | Metal clips that hold the glass slide in place on the stage. |
| 10 | Stage | Flat platform with a hole in the centre where the slide sits, so light can pass up through the specimen. |
| 11 | Condenser | Lens under the stage that focuses light from the illuminator onto the specimen. |
| 12 | Iris diaphragm | Adjustable opening (aperture) below the stage that controls how much light reaches the specimen, which changes brightness and contrast. |
| 13 | Illuminator | The light source in the base that shines light up through the condenser, the specimen and the lenses. |
How to label a microscope diagram
- Start with the frameLabel the flat bottom as the base, the curved support you carry it by as the arm, and the tube between the eyepiece and the objectives as the body tube.
- Follow the light upwardsBegin at the bulb in the base (illuminator), then label the lever ring above it as the iris diaphragm and the lens just under the stage as the condenser.
- Label the stageMark the flat platform as the stage and the two metal arms holding the slide as stage clips.
- Label the lensesThe rotating part above the stage is the revolving nosepiece, the lenses hanging from it are the objective lenses, and the lens at the top that you look into is the eyepiece (ocular lens).
- Tell the focus knobs apartThe large knob on the arm is the coarse focus knob; the smaller one is the fine focus knob. Check your answers against the key.
Coarse focus vs fine focus
| Feature | Coarse focus knob | Fine focus knob |
|---|---|---|
| Size on most microscopes | Larger knob | Smaller knob, often on the same axle |
| How far it moves the stage | A long way, for rough focusing | A tiny amount, for sharp detail |
| When to use it | First, with the low-power objective | After coarse focus, and at high power |
| At high power | Avoid: the objective can hit and break the slide | Use this knob only |
How to work out total magnification
A compound microscope uses two lenses in series. The objective lens makes a magnified image of the specimen, and the ocular lens magnifies that image again. Multiply the two to get the total magnification: a 10x eyepiece with a 40x objective gives 400x, and with a 100x oil immersion objective it gives 1000x. The magnification is engraved on each objective and on the eyepiece.
Magnification is not the only thing that matters. Resolution, the ability to tell two points close together apart, sets how much real detail you can see, and contrast makes the specimen stand out from the background. Closing the iris diaphragm adds contrast but makes the image darker.
How light travels through a brightfield microscope
In a brightfield microscope, light from the illuminator passes up through the iris diaphragm and the condenser, which focuses it on the specimen. Light that passes through the specimen enters the objective lens, travels up the body tube and is magnified again by the eyepiece. The specimen looks darker than the bright background, which is why many specimens are stained first.
How to focus a microscope
Clip the slide onto the stage and centre the specimen over the hole. Start with the lowest-power objective and use the coarse focus knob to bring the specimen into view, then sharpen it with the fine focus knob. Turn the revolving nosepiece to a higher-power objective; most microscopes are parfocal, so the image stays nearly in focus and only the fine focus knob is needed. Adjust the iris diaphragm for the best brightness and contrast.
Quick quiz
1. Which part do you look through?
- Condenser
- Eyepiece (ocular lens)
- Objective lens
- Iris diaphragm
Answer: b) Eyepiece (ocular lens). The eyepiece, or ocular lens, is the lens at the top that you look into.
2. A 10x eyepiece is used with a 40x objective. What is the total magnification?
- 50x
- 40x
- 400x
- 4000x
Answer: c) 400x. Total magnification is eyepiece power times objective power: 10 x 40 = 400x.
3. Which part controls how much light reaches the specimen?
- Iris diaphragm
- Stage clips
- Arm
- Revolving nosepiece
Answer: a) Iris diaphragm. The iris diaphragm opens and closes to let more or less light through.
4. Which knob should you use to focus at high power?
- Coarse focus knob
- Fine focus knob
- Either knob
- Neither, high power does not need focusing
Answer: b) Fine focus knob. At high power only the fine focus knob is used, so the objective does not hit the slide.
5. What does the revolving nosepiece do?
- Focuses light on the slide
- Holds the slide in place
- Holds the objectives and turns to change them
- Supplies the light
Answer: c) Holds the objectives and turns to change them. The revolving nosepiece holds the objective lenses and rotates to switch between them.
Frequently asked questions
What are the parts of a microscope?
A compound light microscope has an eyepiece (ocular lens), body tube, revolving nosepiece, objective lenses, stage, stage clips, condenser, iris diaphragm, illuminator, coarse and fine focus knobs, arm and base.
What does the objective lens do?
The objective lens sits just above the specimen and makes the first magnified image. Most microscopes have several objectives, such as 4x, 10x, 40x and 100x, on a revolving nosepiece.
How do you calculate total magnification on a microscope?
Multiply the magnification of the eyepiece by the magnification of the objective in use. A 10x eyepiece with a 40x objective gives a total magnification of 400x.
What is the difference between the coarse and fine focus knobs?
The coarse focus knob moves the stage a long way for rough focusing at low power. The fine focus knob moves it only slightly to sharpen the image and is the only focus knob to use at high power.
What does the diaphragm do on a microscope?
The iris diaphragm is an adjustable opening below the stage that controls how much light reaches the specimen. Closing it increases contrast but makes the image darker.
What is the function of the condenser?
The condenser is a lens under the stage that gathers light from the illuminator and focuses it onto the specimen.
Why is it called a compound microscope?
It is called compound because it uses more than one lens: the objective lens and the ocular lens magnify the specimen one after the other.
Sources
- OpenStax Microbiology, 2.3 Instruments of Microscopy
- OpenStax Biology 2e, 4.1 Studying Cells (CC BY 4.0)
- OpenStax Concepts of Biology, 3.1 How Cells Are Studied (CC BY 4.0)
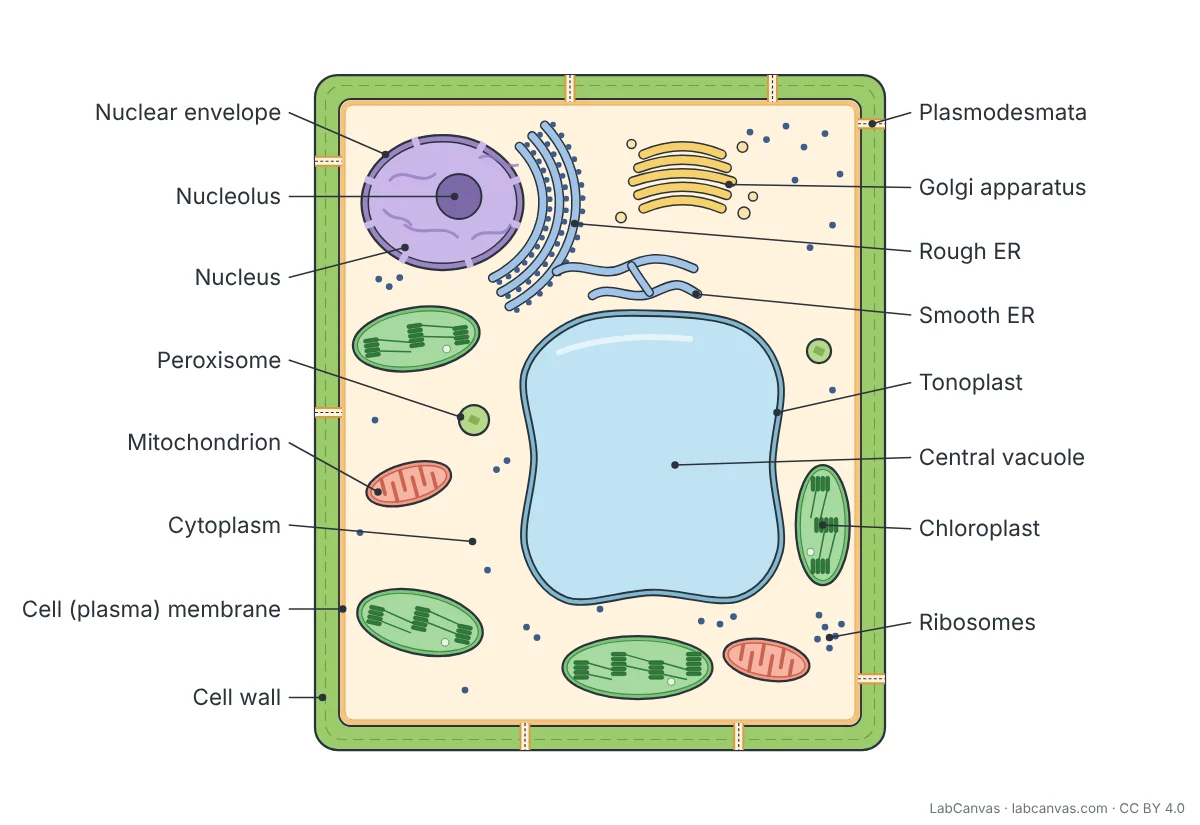
Facts on this page follow these introductory textbooks (OpenStax, CC BY 4.0). The diagram is a simplified illustration; organelles are not drawn to scale.
More free diagrams
Make your own science diagrams
LabCanvas is a browser workspace for scientific figures, slides and posters, with adjustable cells, organelles and molecules.
Edit this diagram